Small tile blue
mucoderm®
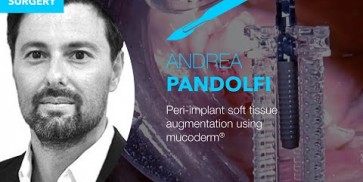
3D soft tissue graft
After placement, the patient’s blood infiltrates the mucoderm® graft through the three-dimensional soft tissue network, bringing host cells to the soft tissue graft surface and triggering the revascularization process. A significant revascularization may begin after the implantation depending on the health condition of the patient. mucoderm® offers a safe alternative to autologous connective tissue, suitable for a diverse range of soft tissue grafting indications.


|
Immobilization
Contact of mucoderm® with the periosteal wound bed and immobilization should be ensured by suturing the matrix to the periosteum using single-interrupted- or all-crossed sutures
Immobilization
Contact of mucoderm® with the periosteal wound bed and immobilization should be ensured by suturing the matrix to the periosteum using single-interrupted- or all-crossed sutures
Immobilization
Contact of mucoderm® with the periosteal wound bed and immobilization should be ensured by suturing the matrix to the periosteum using single-interrupted- or all-crossed sutures
Immobilization
Contact of mucoderm® with the periosteal wound bed and immobilization should be ensured by suturing the matrix to the periosteum using single-interrupted- or all-crossed sutures
Immobilization
Contact of mucoderm® with the periosteal wound bed and immobilization should be ensured by suturing the matrix to the periosteum using single-interrupted- or all-crossed sutures
Immobilization
Contact of mucoderm® with the periosteal wound bed and immobilization should be ensured by suturing the matrix to the periosteum using single-interrupted- or all-crossed sutures
Avoid sharp edges
Cutting the edges of a shortly rehydrated matrix prevent damage of the gingival tissue during flap closure
Avoid sharp edges
Cutting the edges of a shortly rehydrated matrix prevent damage of the gingival tissue during flap closure
Avoid sharp edges
Cutting the edges of a shortly rehydrated matrix prevent damage of the gingival tissue during flap closure
Avoid sharp edges
Cutting the edges of a shortly rehydrated matrix prevent damage of the gingival tissue during flap closure
Avoid sharp edges
Cutting the edges of a shortly rehydrated matrix prevent damage of the gingival tissue during flap closure
Avoid sharp edges
Cutting the edges of a shortly rehydrated matrix prevent damage of the gingival tissue during flap closure
Tunnel technique
For the tunnel technique a prolonged, 10-20 min, rehydration time of the mucoderm® is recommended. Fixation of the matrix by single-interrupted- or allcrossed sutures is required.
Tunnel technique
For the tunnel technique a prolonged, 10-20 min, rehydration time of the mucoderm® is recommended. Fixation of the matrix by single-interrupted- or allcrossed sutures is required.
Tunnel technique
For the tunnel technique a prolonged, 10-20 min, rehydration time of the mucoderm® is recommended. Fixation of the matrix by single-interrupted- or allcrossed sutures is required.
Tunnel technique
For the tunnel technique a prolonged, 10-20 min, rehydration time of the mucoderm® is recommended. Fixation of the matrix by single-interrupted- or allcrossed sutures is required.
Tunnel technique
For the tunnel technique a prolonged, 10-20 min, rehydration time of the mucoderm® is recommended. Fixation of the matrix by single-interrupted- or allcrossed sutures is required.
Tunnel technique
For the tunnel technique a prolonged, 10-20 min, rehydration time of the mucoderm® is recommended. Fixation of the matrix by single-interrupted- or allcrossed sutures is required.
Gingival recessions
Exposure of the mucoderm® matrix should always be avoided in recession coverage procedures. Make sure that the repositioned flap completely covers the mucoderm® matrix. Achieving primary closure over the mucoderm® graft allows blood vessels to penetrate and incorporate the soft tissue graft material. Early exposure may lead to soft tissue graft failure.
Straumann® Emdogain®
Gingival recessions may be treated using mucoderm® and Straumann® Emdogain® together in a single approach. Potential benefits of adding Straumann® Emdogain® to a root coverage procedure with mucoderm® are described in "Collagen matrix and enamel matrix derivative". Make always sure that Straumann® Emdogain® is applied all over the root surfaces before the mucoderm® matrix is placed over the roots.

Extraction of tooth 44

Pre-surgical clinical situation. Multiple adjacent gingival recessions at teeth 12,13 and 14.

Initial clinical situation. Multiple adjacent gingival recessions in regio 11-13.

Pre-operative clinical situation. Gingival recession at the first premolar.

Insufficient keratinized mucosa and extremely shallow vestibule on the maxilla

Initial clinical situation

Initial clinical situation

Initial clinical situation with lack of keratinized tissue

Lack of sufficient keratinized mucosa following extensive horizontal ridge augmentation

Pre-operative clinical situation. Multiple adjacent gingival recessions.

Longitudinal fracture on the root resected tooth 21 with visible buccal fistula


Tooth extraction due to root fracture

Drilling template for guided implant placement


Clinical situation before extraction

Initial situation: missing teeth #11 & 12 and badly broken #21 root

Initial clinical situation with Miller class 1 recession

Initial view of the case. Discoloration of 1.1 and mild class I gingival recession

Preoperative situation – Maxillary defect in area 14-16 (loss of implant 16 due to periimplantitis, tooth 14 extracted recently and area 15 already edentulous for a while)

Initial clinical situation shows an odontogenic fibroma that was growing for years

Initial clinical situation with pronounced vertical and horizontal bone defect

Initial clinical situation - Central incisors with dental destruction and periapical pathology

Situation before extraction of the teeth


Multiple adjacent gingival recessions.

Pre-surgical situation. Multiple adjacent gingival recessions at teeth 12, 13 and 14.


Pre-operative clinical view. Multiple adjacent gingival recessions.

Initial clinical situation with narrow ridge

Pre-operative clinical situation. Gingival recessions at teeth 11 and 21.

Initial clinical situation

X-ray shows a 3-dimensional periondontal defect

Clinical situation before surgery

Baseline clinical situation, frontal view.

X-ray showing endodontic failure of the molar

Initial clinical situation showing severe soft tissue loss

Alveolar socket before soft and hard tissue augmentation

Clinical situation

Initial clinical situation showing strongly compromised tooth 21

Initial view of the clinical case: Class III malocclusion
Treatment plan: Regenerative corticotomy (PAOO)

Initial clinical view of the case. Soft tissue dehiscence around implants 26.

Initial situation displaying insufficient bone width


Occlusal view of attached maxgraft® cortico at the buccal site


Initial situation before surgery. Patient lost central incisors 1 month ago due to endodontic failures

Initial clinical situation

Gingival recession at tooth 13. Free gingival graft (FGG) of a previous surgery for root coverage visible.


Initial clinical situation

Pre-surgical clinical situation. Deep gingival recessions at both upper canine.

Initial clinical situation with traumatic loss of tooth 21

Pre-operative clinical situation. Shallow multiple adjacent gingival recessions in the first quadrant.

Initial clinical situation

X-ray of initial clinical situation

Multiple adjacent recessions in the upper jaw.

recession on tooth 11

Full-thickness flap preparation bucally and lingually

Intact socket following atraumatic tooth extraction

X-ray control before tooth extraction

Bone defect in area 11-21 due to two lost implants (periimplantitis) after 15 years of function


Pre-operative clinical situation: changed color in the gingiva in the front maxilla

Initial clinical situation showing tooth 45 not worth preserving

Initial situation - A young female 34 years old lost her front teeth in an surfing accident and she had a 5 unit bridge supported by her upper left lateral and right canine. The restoration failed and both supporting crowns have exposed and leaking margins.


Clinical view 8 weeks after extraction of teeth 25 and 26

Please Contact us for Literature.
Jason® membrane
Native pericardium membrane for GBR/GTR
Due to the unique production process, the superior properties of the native pericardium are preserved during the extensive cleaning procedure that is applied for the production of Jason® membrane. Therefore, Jason® membrane shows a natural honeycomb-like, multilayered collagen structure with an increased content of collagen type III leading to a remarkable tear resistance to and a slow degradation of Jason® membrane. This ensures a natural long barrier function, making the Jason® membrane our recommended choice particularly for large augmentative procedures.


|
Rehydration
The Jason® membrane can be applied dry or pre-hydrated in sterile saline solution or blood from the defect. The initial placement of the dry membrane with subsequent application of the graft material is particularly advantageous for lateral augmentations. After rehydration the membrane can be folded over the defect.
Fixation
Jason® membrane exhibits a remarkable multi-directional tear resistance. Therefore, it can easily be pinned, sutured or even screwed without rupturing.
Fixation
Jason® membrane exhibits a remarkable multi-directional tear resistance. Therefore, it can easily be pinned, sutured or even screwed without rupturing.
Fixation
Jason® membrane exhibits a remarkable multi-directional tear resistance. Therefore, it can easily be pinned, sutured or even screwed without rupturing.
Fixation
Jason® membrane exhibits a remarkable multi-directional tear resistance. Therefore, it can easily be pinned, sutured or even screwed without rupturing.
Fixation
Jason® membrane exhibits a remarkable multi-directional tear resistance. Therefore, it can easily be pinned, sutured or even screwed without rupturing.
Fixation
Jason® membrane exhibits a remarkable multi-directional tear resistance. Therefore, it can easily be pinned, sutured or even screwed without rupturing.
Exposure
Exposure of Jason® membrane should be avoided, since fast bacterial resorption significantly reduces the barrier function of the thin Jason® membrane. In case of an unstable soft tissue situation or if you expect a wound dehiscence to occur, it is recommended to cover the membrane with a Jason® fleece (where applicable, soaked in antibiotics) to protect the healing area. In case of a dehiscence the wound usually heals without complications by formation of free granulation tissue.
Shaping
Jason® membrane can be cut to the desired shape and size with a pair of scissors - while maintaining sterility. It may be helpful to use appropriate templates for defining the required size of the membrane.
Shaping
Jason® membrane can be cut to the desired shape and size with a pair of scissors - while maintaining sterility. It may be helpful to use appropriate templates for defining the required size of the membrane.
Shaping
Jason® membrane can be cut to the desired shape and size with a pair of scissors - while maintaining sterility. It may be helpful to use appropriate templates for defining the required size of the membrane.
Shaping
Jason® membrane can be cut to the desired shape and size with a pair of scissors - while maintaining sterility. It may be helpful to use appropriate templates for defining the required size of the membrane.
Shaping
Jason® membrane can be cut to the desired shape and size with a pair of scissors - while maintaining sterility. It may be helpful to use appropriate templates for defining the required size of the membrane.
Shaping
Jason® membrane can be cut to the desired shape and size with a pair of scissors - while maintaining sterility. It may be helpful to use appropriate templates for defining the required size of the membrane.
Placement
Jason® membrane has one rough and one slightly smoother surface. The smoother, fine structured side is marked „G“ at the top right corner and should be placed towards the gingiva. The rougher side should face the bone. However, there is no problem if the membrane is placed the other way around, since the long-term barrier function of the membrane will still provide sufficient protection for the regeneration site.

Preoperative Ortopantomogram of the teeth planned for extraction

DVT image demonstrating horizontal and vertical amount of bone available


Extraction of tooth 21 after endodontic treatment

Implant insertion in atrophic alveolar ridge

Initial clinical situation with broken bridge abutment in regio 12 and tooth 21 not worth preserving

Initial clinical situation with gum recession and labial bone loss eight weeks following tooth extraction

Situation after tooth extraction.

Initial clinical situation

Initial situation after extraction of tooth 21 after 6 months

Situation after tooth removal.
Bone defect in area 11-21 due to two lost implants (periimplantitis) after 15 years of function

Pre-operative clinical situation: severe atrophy of the maxillary bone

60-year-old female patient presented with a chronic infection on tooth #11.
Since she has a high lip line matching the gingival margins of the adjacent central incisor and creating a root eminence is extremely important. For these reasons, the treatment of choice was an allograft bone ring enabling immediate placement of the dental implant with simultaneous regeneration of her ridge.


Initial clinical situation: 9 mm pocket depth associated with root fracture

Initial presentation of failing post retained crown with previous history of failed apicectomies and amalgam tattooing and scar tissue
Initial clinical situation with pronounced vertical and horizontal bone defect
Clinical view 8 weeks after extraction of teeth 25 and 26

Pre-operative: loss of interdental papilla between 12 and 11 associated with gingival inflammation and pus

Preoperative x-ray, multiple residual cysts of the upper jaw

Clinical situation at baseline: Situation after tooth extraction UR1 due to a failed endodontic treatment 3 months previously

Situation before extraction of the teeth

Atrophic alveolar ridge in the left mandible

Instable bridge situation with abscess formation at tooth #15 after apicoectomy

Preoperative clinical situation

Pre-operative radiographic view.

Initial situation pre-op: Central incisors with mobility 3

Initial clinical situation.

Initial situation: X-ray scan reveals eggshell thin sinus floor (1-3 mm) on both sites of the maxilla; green areas indicate the planned maxgraft® bonerings and red areas the planned implants

Pre-surgical situation. Teeth 26 and 27 missing.


Pre-op picture of affected teeth 11 and 21

Preoperative radiological situation

Clinical view of the case.
Preoperative situation – Maxillary defect in area 14-16 (loss of implant 16 due to periimplantitis, tooth 14 extracted recently and area 15 already edentulous for a while)


Initial x-ray showing bone loss around implants placed 5 years ago in another dental clinic

Initial clinical situation

Initial situation - endodontically failing tooth 22, very thin biotype, high lip line and esthetic expectations


Loss of teeth in anterior maxilla caused by periodontitis

Initial situation after root channel treatment

Preoperative CBCT analysis

Preparation of a single tooth defect with severely resorbed vestibular wall

Three implants placed in a narrow posterior mandible

Initial clinical situation with single tooth gap in regio 21

Clinical situation: 71-old patient with atrial fibrillation and Warfarin medication

Initial situation 57-year old female patient. X-ray scan reveals severe bone loss due to inflammation in region 13. Treatment plan was extraction of teeth 13 and 14 and augmentation after healing.

Initial clinical situation, regio #16


Model of the initial defect computed from a CBCT scan - buccal view

Clinical situation

Lateral view of the defect in the posterior right maxilla.


Initial clinical situation.

The patient presented with pathologic mobility of upper left central incisor. Radiographic examination revealed significant circumferential attachment loss with an unfavorable crown to root ratio.

Initial situation – Treatment plan: Replace the adhesive upper left central incisor bridge with a dental implant

Preoperative CBCT: vertical bone defects in the 3rd & 4th quadrant

Initial clinical situation: Free end situation in quadrant three and four

Initial x-ray, tooth 25 compromised and to be extracted

Preoperative x-ray, severe bone atrophy

The patient presented with severe pain in the lateral incisor and a deficient adhesive provisional. Bruxism resulted in canine loss and premature contact in the lateral incisor.

Initial x-ray, ten years post implantationem alio loco, large peri-implant bone loss
Please Contact us for Literature.
collprotect® membrane
Native collagen membrane
The unique processing as well as the open-porous and the three-dimensional collagen structure of collprotect® membrane are the basis for its safe application in dental bone and tissue regeneration. Owing to its natural hemostyptic function, the membrane enables early wound stabilization, thus supporting the natural wound healing. The rough surface of collprotect® membrane facilitates a fast integration into the surrounding soft tissue.
|
Shaping
The membrane can easily be cut-to-size with scissors or a scalpel to fit the defect. It is recommended to cut the membrane in dry status prior to application, although shaping the membrane after rehydration is also possible.
Shaping
The membrane can easily be cut-to-size with scissors or a scalpel to fit the defect. It is recommended to cut the membrane in dry status prior to application, although shaping the membrane after rehydration is also possible.
Shaping
The membrane can easily be cut-to-size with scissors or a scalpel to fit the defect. It is recommended to cut the membrane in dry status prior to application, although shaping the membrane after rehydration is also possible.
Shaping
The membrane can easily be cut-to-size with scissors or a scalpel to fit the defect. It is recommended to cut the membrane in dry status prior to application, although shaping the membrane after rehydration is also possible.
Shaping
The membrane can easily be cut-to-size with scissors or a scalpel to fit the defect. It is recommended to cut the membrane in dry status prior to application, although shaping the membrane after rehydration is also possible.
Shaping
The membrane can easily be cut-to-size with scissors or a scalpel to fit the defect. It is recommended to cut the membrane in dry status prior to application, although shaping the membrane after rehydration is also possible.
Fixation
Normally, fixation is not necessary, because of the excellent ability of the collprotect® membrane to adhere to the underlying tissue as well as adapt to surface contours. However, the collprotect® membrane supports suturing and pinning if required.
Fixation
Normally, fixation is not necessary, because of the excellent ability of the collprotect® membrane to adhere to the underlying tissue as well as adapt to surface contours. However, the collprotect® membrane supports suturing and pinning if required.
Fixation
Normally, fixation is not necessary, because of the excellent ability of the collprotect® membrane to adhere to the underlying tissue as well as adapt to surface contours. However, the collprotect® membrane supports suturing and pinning if required.
Fixation
Normally, fixation is not necessary, because of the excellent ability of the collprotect® membrane to adhere to the underlying tissue as well as adapt to surface contours. However, the collprotect® membrane supports suturing and pinning if required.
Fixation
Normally, fixation is not necessary, because of the excellent ability of the collprotect® membrane to adhere to the underlying tissue as well as adapt to surface contours. However, the collprotect® membrane supports suturing and pinning if required.
Fixation
Normally, fixation is not necessary, because of the excellent ability of the collprotect® membrane to adhere to the underlying tissue as well as adapt to surface contours. However, the collprotect® membrane supports suturing and pinning if required.
Exposure
In case of a dehiscence the wound usually heals without complications by granulation tissue formation and free contraction. Nevertheless, exposure of the membrane should be avoided since the fast bacterial resorption that occurs significantly reduces the barrier function of the membrane. In cases of unstable soft tissue situations, or if a wound dehiscence is expected to occur, it is recommended to cover the collprotect® membrane with a Jason® fleece for protection of the wound healing area (soaked with antibiotics, where applicable).
Lateral augmentation
For lateral augmentation it is advantageous to place the dry membrane upright in the defect initially, and then fill the defect with a graft material. After rehydration the membrane may be turned down over the defect.
Lateral augmentation
For lateral augmentation it is advantageous to place the dry membrane upright in the defect initially, and then fill the defect with a graft material. After rehydration the membrane may be turned down over the defect.
Lateral augmentation
For lateral augmentation it is advantageous to place the dry membrane upright in the defect initially, and then fill the defect with a graft material. After rehydration the membrane may be turned down over the defect.
Lateral augmentation
For lateral augmentation it is advantageous to place the dry membrane upright in the defect initially, and then fill the defect with a graft material. After rehydration the membrane may be turned down over the defect.
Lateral augmentation
For lateral augmentation it is advantageous to place the dry membrane upright in the defect initially, and then fill the defect with a graft material. After rehydration the membrane may be turned down over the defect.
Lateral augmentation
For lateral augmentation it is advantageous to place the dry membrane upright in the defect initially, and then fill the defect with a graft material. After rehydration the membrane may be turned down over the defect.
Protection of the Schneiderian membrane
To protect the Schneiderian membrane from damage, a membrane may be introduced before filling the sinus cavity with the bone graft material.
Protection of the Schneiderian membrane
To protect the Schneiderian membrane from damage, a membrane may be introduced before filling the sinus cavity with the bone graft material.
Protection of the Schneiderian membrane
To protect the Schneiderian membrane from damage, a membrane may be introduced before filling the sinus cavity with the bone graft material.
Protection of the Schneiderian membrane
To protect the Schneiderian membrane from damage, a membrane may be introduced before filling the sinus cavity with the bone graft material.
Protection of the Schneiderian membrane
To protect the Schneiderian membrane from damage, a membrane may be introduced before filling the sinus cavity with the bone graft material.
Protection of the Schneiderian membrane
To protect the Schneiderian membrane from damage, a membrane may be introduced before filling the sinus cavity with the bone graft material.

Pre-operative OPG shows deep vertical intrabony defects on the distal aspects of teeth 13 and 14.

Pre-surgical probing reveals a deep intrabony defect on the distal aspect of the upper canine.

Pre-operative radiograph. Intrabony defect on the mesial aspect of tooth 14.


Initial X-ray presenting a very deep intrabony defect of tooth 21


Surgical presentation of the alveolar ridge with reduced amount of horizontal bone available

DVT control after sinusitis surgery, residual bone height 1 mm


OPG of the initial situation – provision of missing denture in regio 44 to 47 by a resin-retained bridge

The patient presented with a terminal fracture of the crown tooth number 12

Clinical situation with narrow alveolar ridge in the lower jaw

Extended horizontal and vertical defect of the maxilla following tumor resection and reconstruction with a scapula graft

Clinical situation of the edentulous distal maxilla before the surgery

DVT image showing the reduced amount of bone available in the area of the mental foramen
Please Contact us for Literature.
collacone®
Natural collagen cone
After tooth removal, the healing of an extraction socket requires the formation and maturation of a blood clot, followed by the infiltration of fibroblasts that replace the coagulum; finally, the application of a provisional matrix allows the formation of new bone tissue. The spongy structure of collacone® ensures an easy and fast application in extraction sockets. Notably, the structure of the cone is maintained after insertion into the defect.
|
Application and shaping
After opening the package, the collacone® is taken out with dry sterile instruments, placed and lightly pressed onto the cleaned wound with swabs. The collacone® can easily be cut to the necessary size with a sterile pair of scissors.
Application and shaping
After opening the package, the collacone® is taken out with dry sterile instruments, placed and lightly pressed onto the cleaned wound with swabs. The collacone® can easily be cut to the necessary size with a sterile pair of scissors.
Application and shaping
After opening the package, the collacone® is taken out with dry sterile instruments, placed and lightly pressed onto the cleaned wound with swabs. The collacone® can easily be cut to the necessary size with a sterile pair of scissors.
Application and shaping
After opening the package, the collacone® is taken out with dry sterile instruments, placed and lightly pressed onto the cleaned wound with swabs. The collacone® can easily be cut to the necessary size with a sterile pair of scissors.
Application and shaping
After opening the package, the collacone® is taken out with dry sterile instruments, placed and lightly pressed onto the cleaned wound with swabs. The collacone® can easily be cut to the necessary size with a sterile pair of scissors.
Application and shaping
After opening the package, the collacone® is taken out with dry sterile instruments, placed and lightly pressed onto the cleaned wound with swabs. The collacone® can easily be cut to the necessary size with a sterile pair of scissors.
Rehydration
Generally, dry application of collacone® is recommended, since soaking or moistening the cone prior to implantation may impair its hemostatic properties. At the defect site the fleece rapidly soaks up blood. The collacone® maintains integrity in the presence of blood and during application.
Fixation
At contact with the wet wound surface, the collacone® sticks to the wound and forms a gel like bond with the blood. Fixation by cross- or holding sutures could help keeping the cone in place when applied in extraction sockets.
Fixation
At contact with the wet wound surface, the collacone® sticks to the wound and forms a gel like bond with the blood. Fixation by cross- or holding sutures could help keeping the cone in place when applied in extraction sockets.
Fixation
At contact with the wet wound surface, the collacone® sticks to the wound and forms a gel like bond with the blood. Fixation by cross- or holding sutures could help keeping the cone in place when applied in extraction sockets.
Fixation
At contact with the wet wound surface, the collacone® sticks to the wound and forms a gel like bond with the blood. Fixation by cross- or holding sutures could help keeping the cone in place when applied in extraction sockets.
Fixation
At contact with the wet wound surface, the collacone® sticks to the wound and forms a gel like bond with the blood. Fixation by cross- or holding sutures could help keeping the cone in place when applied in extraction sockets.
Fixation
At contact with the wet wound surface, the collacone® sticks to the wound and forms a gel like bond with the blood. Fixation by cross- or holding sutures could help keeping the cone in place when applied in extraction sockets.
Exposure
In case of a dehiscence the wound usually heals without complications by granulation tissue formation and free contraction.
Exposure
In case of a dehiscence the wound usually heals without complications by granulation tissue formation and free contraction.
Exposure
In case of a dehiscence the wound usually heals without complications by granulation tissue formation and free contraction.
Exposure
In case of a dehiscence the wound usually heals without complications by granulation tissue formation and free contraction.
Exposure
In case of a dehiscence the wound usually heals without complications by granulation tissue formation and free contraction.
Exposure
In case of a dehiscence the wound usually heals without complications by granulation tissue formation and free contraction.

Tooth 13 planned for extraction

Situation before tooth extraction.
Initial x-ray, ten years post implantationem alio loco, large peri-implant bone loss

Central and lateral incisors are planned for extraction

Initial clinical situation: Bone defect in the upper right maxilla (teeth #14-16)

Situation after tooth extraction.
Please Contact us for Literature.
collafleece®
Resorbable collagen sponge
After adhesion to the collagen fibrils, platelets aggregate and release coagulation factors by degranulation. This initiates the coagulation cascade that leads to hemostasis. Due to its hemostatic properties, collafleece® promotes the formation and stabilization of the blood coagulum and can be applied for wound protection and to support wound healing (i.e. biopsy harvesting sites, coverage of augmentation sites). collafleece® is completely resorbed by the body’s own processes within two to four weeks.

|
Shaping
The collafleece® can be cut to the required size with a pair of scissors before application onto the wound or insertion into the wound. Should greater amounts of fleece be required for haemostasis, the excess material must be removed before the wound is closed. Over-packing the wound with collagen should be avoided.
Fixation
Fixation of the collafleece® by sutures or pins is not possible, but also not needed. After shaping, the fleece is carefully pressed onto the wound site with a clamp or a pair of tweezers until the fibrin ensures adhesion of the fleece to the wound site. An indirect fixation by cross- or holding sutures could help to keep the fleece in place when applied in extraction sockets or soft tissue harvesting sites.
Exposure
In case of a dehiscence the wound heals without complications by granulation tissue formation and free contraction. The main problem of an exposure of a collagen membrane is its fast bacterial resorption resulting in loss of the barrier function. As the intention of collafleece® and collacone® is not providing a barrier but supporting wound healing and hemostasis, fast resorption in case of open healing is not a problem. Application of a collafleece® on top of a barrier membrane is recommended in unstable soft tissue situations, or for protection of the wound healing area if a wound dehiscence is expected to occur (soaked with antibiotics, where applicable).
Rehydration
Generally, the collafleece® is applied dry, because soaking or moistening the fleece prior to implantation may impair its haemostatic properties. The collafleece® soaks up blood rapidly at the defect site.
Rehydration
Generally, the collafleece® is applied dry, because soaking or moistening the fleece prior to implantation may impair its haemostatic properties. The collafleece® soaks up blood rapidly at the defect site.
Rehydration
Generally, the collafleece® is applied dry, because soaking or moistening the fleece prior to implantation may impair its haemostatic properties. The collafleece® soaks up blood rapidly at the defect site.
Rehydration
Generally, the collafleece® is applied dry, because soaking or moistening the fleece prior to implantation may impair its haemostatic properties. The collafleece® soaks up blood rapidly at the defect site.
Rehydration
Generally, the collafleece® is applied dry, because soaking or moistening the fleece prior to implantation may impair its haemostatic properties. The collafleece® soaks up blood rapidly at the defect site.
Rehydration
Generally, the collafleece® is applied dry, because soaking or moistening the fleece prior to implantation may impair its haemostatic properties. The collafleece® soaks up blood rapidly at the defect site.

Clinical situation before extraction and implantation
X-ray control before tooth extraction
Preoperative clinical situation

Pre-operative OPG, tooth 25 planned for extraction
Preoperative CBCT analysis

Pre-operative situation showing tooth 21 with deep periodontal pocket. Tooth presented with mobility grade III.

DVT control after sinusitis surgery, residual bone height 1 mm
Please Contact us for Literature.